


Making and bending ribs
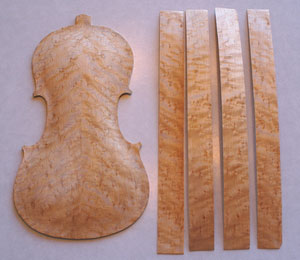
They were cut out of the same Birds Eye Maple as the back and neck.
I ripped them about 1.5mm thick and 34mm high. Then ran them through the oscillating sander with a guide, set to 1mm away from the sanding wheel to get the proper thickness. The 34mm height allowed about 2mm on above and below the blocks when glued in place. This will give me some margin of error to sand down to the height of the corner blocks once all of the ribs were attached to the mould.
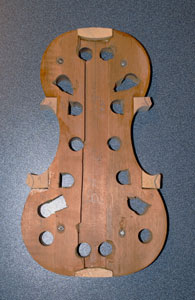
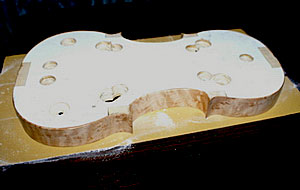
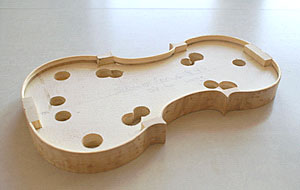
Next was cutting the height of the upper, lower and corner blocks, then gluing them into the mould to be knocked out later when the ribs are attached.
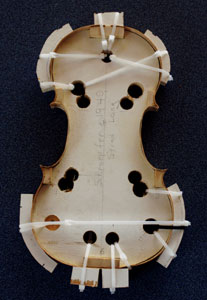
Started with the mould to secure the ribs after shaping them on the bending iron. First had to temporarily glue blocks in mould, then bent "C" ribs, which where left a bit long, and glued to the corner blocks. The ribs do not get glued to the form, since it gets removed later. Notice on this form above, the corner blocks where only cut on the "C" bouts and not on the upper and lower. The ends of the "C" ribs will get cut after they are glued to the corner blocks. This allow a perfect fit of the upper and lower rib to the "C" rib.
Check out the sockets and tie wraps. Used what I had laying around to save time, without making any fancy wooden outer blocks for clamping.
Notice I just worked on the corners, left them dry and then glued the ribs to the neck and end blocks after.
Bet Stradivari wished he had sockets and tie wraps!
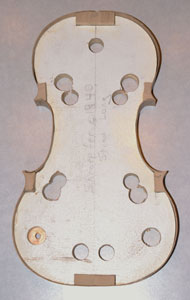
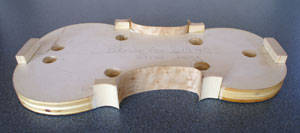
Once the glue dried and the ribs where secure in place, I lied a large sheet of 320gt sandpaper on a flat surface. I took the mould with the ribs glued in place and worked it back and forth, sanding the height of the ribs down to match the blocks. Turned it over and duplicated on the other side. This technique gets a perfectly flat and straight set of ribs to attach to the top and back plates.
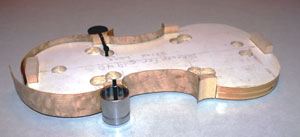
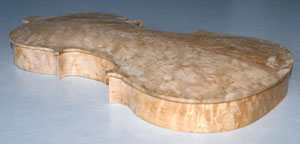
The back sitting on ribs
I made the lining out of spruce. Running around the upper and lower inside edge of the ribs which allows for a wider glue surface to attach the top and back Cut it 1.8mm thick and 8mm high with a taper starting 4mm down, tapering to almost nothing at the bottom It is mortised into the upper and lower corner blocks at the "C" bout.
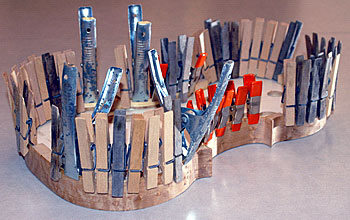
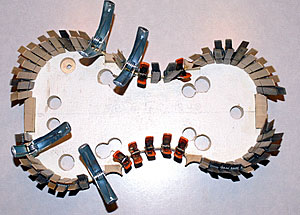
I As you can see I utilized what was on hand, clamps and clothespins.
Look at the lining around the edges
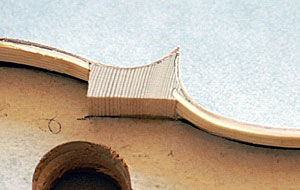
Here is how I mortised the lining into the corner blocks, only in the "C" bouts.


The lining on both upper and lower edge after the form in knocked out and the blocks trimmed.
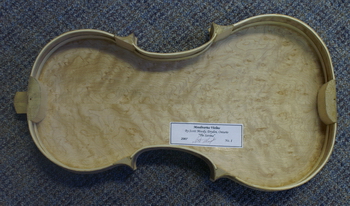
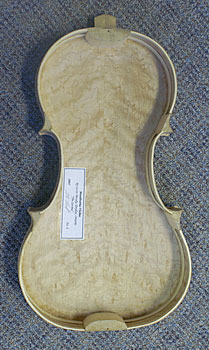
Ready for the top to get glued on.
